Saturday, February 9, 2013

Upcycling Denim


I’ve seen some great creations out of upcycled denim clothing (check out these Etsy creations or these on my Denim Pinterest board) and I wanted to try it out for myself.  My daughter had a pair of jeans with an awkward cut in the upper thigh. 
Kids manage to ruin things in the most interesting ways, right?
I tried to figure out a way to sew or patch it but I didn’t like any of those options so I decided to cut up the jeans and see what I could make from the material.  Here’s what hapened.
I decided to use the top of the jeans at the waistband for a skirt so I first removed the back pockets and cut the top 6 inches off the pants. 

Back pockets removed.  I love my seem ripper!

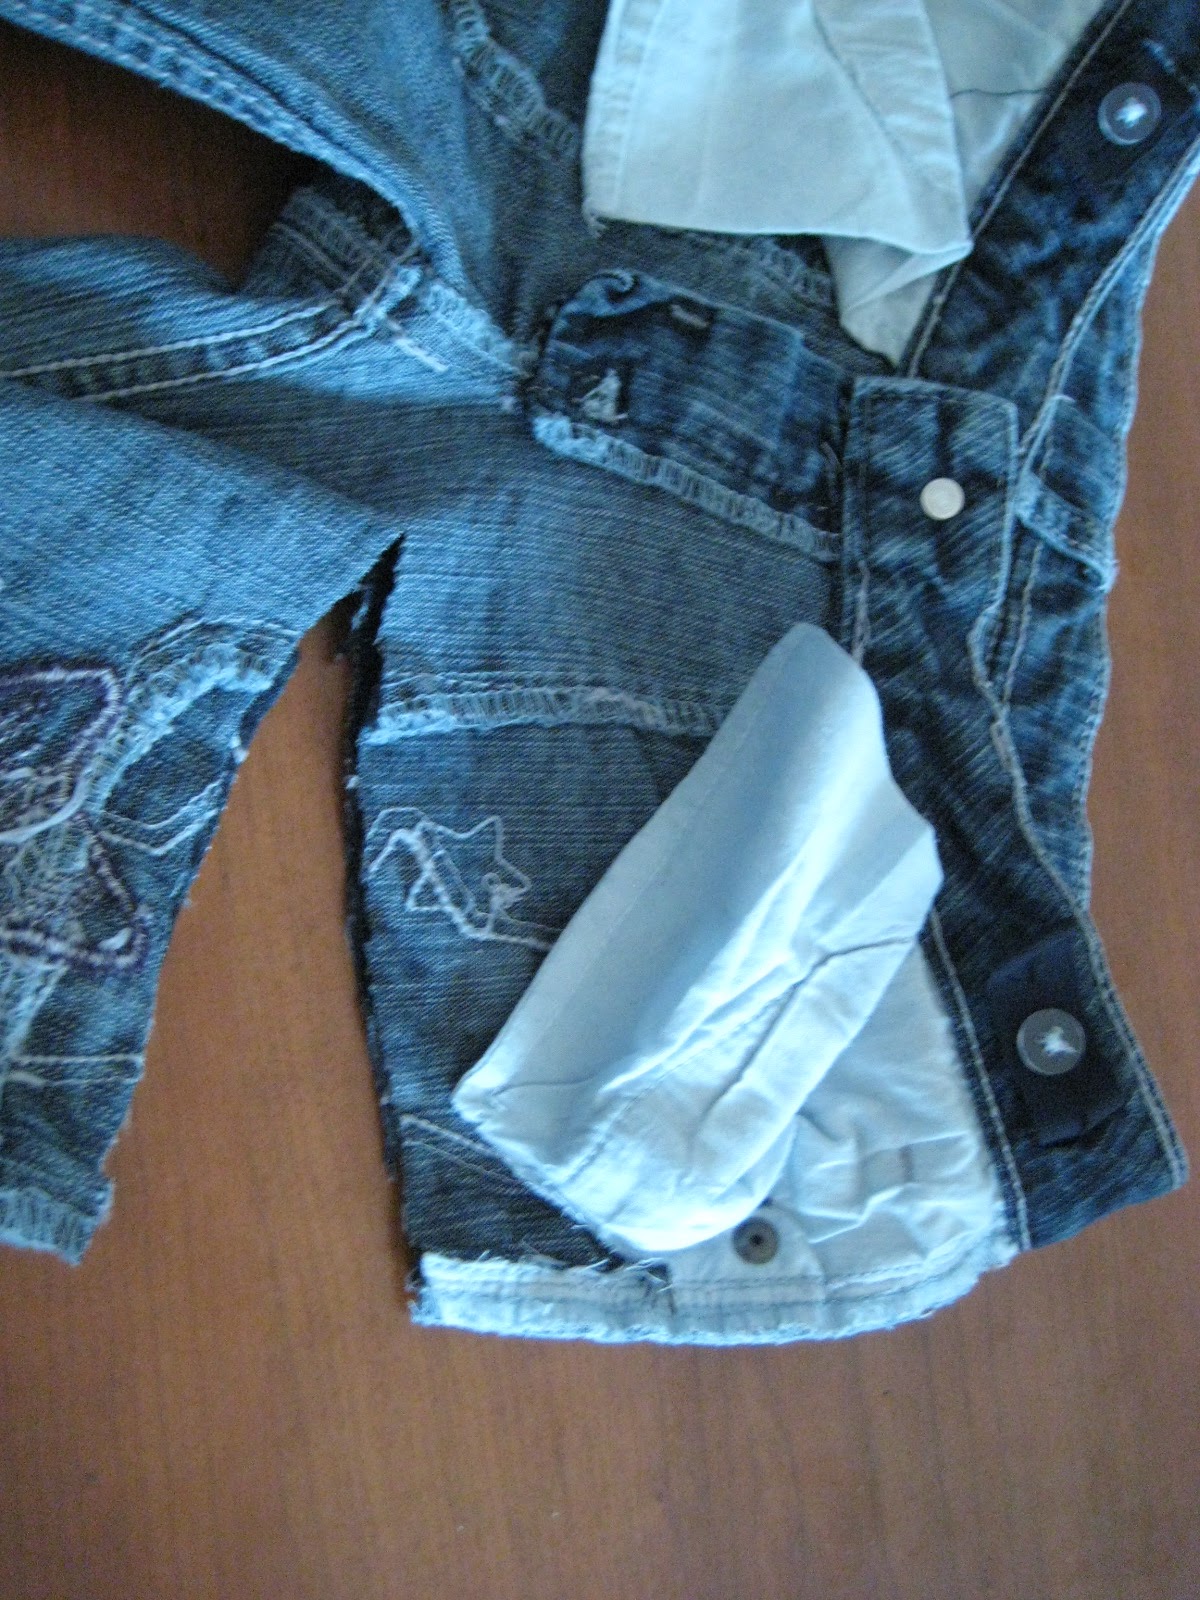
I want to keep the front pockets intact, so I trimmed them from the side so I could cut the length I wanted and preserve the pockets.  I'll sew the pockets together later.

I then cut the bottom 14 inches off both legs to make 2 bags.  I reattached the pockets to the lower legs and cut the seams out of the upper leg sections to use as bag straps. This is my favorite part.  I cut the seams with about ¼ inch fabric on either side of the seam and pulled out the vertical thread to leave the fringed edge.  It looks cute and it won’t fray any further now. 


Bottoms cut off and pockets prepared to sew on

Seems plus some adjacent material removed from upper leg portion.


Blue vertical threads removed leaving white fringe.
This will be the bag's handle.  Cute right?

To finish the bag, I just sewed the bottom of the pants together to make the base of the bag and then hemmed the top edge and added the strap.  I added a button and button hole too for a closure.  All done! 


I couldn’t stop there.  In the end, out of 1 pair of girls size 7 pants, I have already made 2 bags, a flower clip, a jar lid, a couple of bracelets and a mug rug. 

I’m even selling some of these items on my Etsy shop, Inspired Sensibility.   I didn’t finish the skirt yet but that may be a future post!

Tuesday, January 22, 2013

Quick Quilted Throw Pillow


I recently found myself with a basket of very good quality button-down shirts that I could not wear.  Unfortunately button-downs do not flatter my body shape but I loved the colors and patterns of the fabrics in these shirts.  I knew there was something useful I could make from them. 

I decided to try this quilting square pattern that I found at Andie Johnson Sews   Thanks for the great tutorial Andie!
The pillow insert and two button down shirts that will be chopped up.


I had a pillow insert lying around and thought I would try using this pattern to make a throw pillow. Two complementary fabric shirts would be enough fabric for the pillow.  These are solid light pink and gingham light pink.  The colors don't show up too well in photos but I tried my best.  I have never done any quilting at all in my entire life but I do have basic sewing skills so I thought I’d give it a try. 

I couldn't use the size suggested in the tutorial since I needed the size to fit my pillow insert. I’m terrible at measuring so I cut a piece of ribbon the length of the top pillow fabric.  It helped that the pillow insert was square!  I folded the ribbon in half and allowing a bit extra for seems, I cut four identical quarters from each shirt.  To make sure the cut was square, I folded the fabric diagonally and trimmed.  Someday I will have a rotary blade and mat but for now, I have to manage without.  


My fancy measuring technique
The size of my squares with seem allowance


I cut open all the sleeves to make the most of the shirt fabric.

Here are my 4 squares in the solid pink.  There are 4 more in the gingham.
Squaring it up


I cut four identical squares from each fabric and followed the quilt square tutorial.  You may notice that I missed a step and my pattern does not look quite like the tutorial.  This was accidental and it made my edges all uneven but it was getting late and I decided to trim and go with it.  I then made the other side the same way so they matched. 


I had some gathered lace and thought it would be a lovely addition to the pinks.  I was pretty pleased with the final result.  What do you think?


Friday, January 11, 2013

Discount Curtain Upgrade


When I was putting away all of the festive holiday decorations this year, I decided to make a few minor decorating adjustments around the house.  It’s nice to change up some things to give it a fresh feeling.  Of course, I don’t want to spend a ton of money making these adjustments so I’ve come up with a few cheap/effective solutions.  Today, I want to share my cheap curtain upgrade idea. 

I started with these nice-enough curtains from a discount warehouse and hung them in the dining room.  They are a soft mossy green with iridescent squiggles running through.   I like the fabric, and the colors suit the room really well but something was too blah about them. 


I wanted some softer lines and curves rather than the right angles of this arrangement.  I like the idea of a scalloped valance.  Something like this. 


I figured I could sew some gathers but first, I set out to find some buttons to attach at the gathered points.  When I saw the price of the buttons that I liked, I decided to look for other options. That’s when I found these clip/pin flowers made from ribbon. 


They were $1 each and I knew this would be a fast, elegant and cheap alternative to sewing the gathers and attaching buttons.  All I needed was to pick up a roll of pretty matching ribbon for tie backs and a couple of sheers that I knew I had at home. 


Step 1: Gather curtain and clip on flower

Step 2: Tie bows from ribbon to make tie backs.
Step 3: Add shears and tie back.  Done!

The ribbon cost $3 and the flowers were $2.  So it took $5 and about 10 minutes of my time to get to my final result.  What do you think?

Thursday, December 6, 2012

Homemade All-occasion Gift Tags


 For some reason, I have a hard time throwing away greeting cards that we receive from family and friends.  I know that each card was chosen with love, and time was spent to compose and deliver the special message.  So after years of collecting holiday, birthday, Mother’s Day and thank you cards, I have a huge bag full.  This year I've decided to put them to good use.
 
First, I went through the cards and saved the extra memorable ones. I’m not sure what I’ll do with those yet, but I can’t bear to part with them yet. The remaining cards are being repurposed into gift tags. 
Some of the cards that were chosen to be transformed into gift tags.
 
My best tool for this project was definitely my Fiskars sliding paper cutter. I don’t know what I would do without it! I suppose it could be accomplished with scissors or a ruler and craft knife, but I would certainly not choose to do it that way. Other supplies that came in handy were a hole punch, corner rounding punch (not necessary, but improves the look of the tag), to/from stamp and ink pad, other various stamps, stickers and skinny ribbon or cord.
 
My handy paper cutter in action

Various additional supplies
 

All you need to do is start cutting the cards into reasonable size squares or rectangles. I tried to capture the best parts of the images on the card while at the same time getting as many gift tags from each card as possible. I also needed to make each card big enough for the stamp to fit on the back and be sure there wasn’t any writing on the back. I even cut out plain solid cards, and used stickers and stamps to embellish the front. I ended up with all different sizes and occasions but mostly holiday images.

 
Those 5 cards in the earlier photo made over 20 gift tags!

I got 5 cute ones out of this one card!


The finishing touches involved punching a hole in the top, rounding the top corners, stamping the to/from image on the back and tying a ribbon through the hole. 
A back and front of 2 tags
I plan to use many of the gift tags myself but I thought I could package them up for simple, yet useful, gifts. I used some cello bags, repurposed from other craft supplies, and a folded index card on top. I’m probably going to print some labels to customize the package top if I can get my printer to cooperate. My daughter helped so much with the cutting, stamping and punching. She’s excited to give some of these packages to her teachers as holiday gifts.
 

I’m also working on an idea for using some of the beautiful messages from greeting cards to display in a frame, either with or without pictures. Here’s a preview of what I have in mind. Maybe it gives you some inspiration as well. Please share your ideas for repurposing greeting cards. I’d love to hear about them!

I have this collage frame I've never opened.


I could put some scrapbook paper behind the messages to add a punch of color.


I like the idea of having all similar themed sayings in one collage but would also be good to have some photos mixed in.  It would make a nice gift...think Anniversary!


Thursday, November 29, 2012

From Fallen Greens to Holiday Decor

A storm a couple of weeks ago blew branches from nearby evergreen trees into our yard. We gathered them up for the trash but with the holidays around the corner, I decided to put them to use as free exterior decorations.

Pile of branches gathered on the deck
I gathered a pair of garden gloves, some needle-nose pliers, twist ties and cable ties and got to work. The twist ties were actually salvaged from previous birthday gift packaging. Ever notice how some kids toys are tied to the package? I saved those plastic-coated wires thinking they'd come in handy some day. Well this is the day!


All the equipment needed to make the evergreen garlands


The tree that dropped many long droopy branches, just perfect for garlands.

To make the garland, I overlapped the beginning of one branch with the end of another branch and used the cable ties to hold them together.  The needle-nose pliers do double duty to pull the cable ties super tight and then to cut off the extra tail.


It took about 6 branches to make this piece which was long enough to cover an iron support on the front porch.  Take a look at the porch before, during and after.  I used the plastic coated wire to attach the garland to the support.


About 6 branches attached and ready to hang.

Boring iron support before

Getting better with the garland.


I added some wire edged ribbon to take it up a notch.
 When I finished with the garland, I still had some branches left so I wired them together, added some fake berry sprigs, pine cones from the yard, and a bow.  I hung this next to the garage on the other side of the front porch. 

Homemade swag made from branches that fell into the yard.

Wednesday, November 21, 2012

Inspired Sensibility

With the holidays on the horizon, I've been creating ornaments, wreaths, jewelry and gifts.  Some of my creations can be seen and purchased at my Etsy shop InspiredSensibility.  I would value any comments or suggestions that you can offer!

Friday, November 9, 2012

From Clearance Cast-off to Beautiful Bling


I was out shopping for a belt for my son this week. He is 4 and all of his pants either fit him in length or in the waist, but not both.  Since high-waters are out-of-season, I went in search of a little boy’s belt. 
Well, I didn’t find one, but I found a really ugly necklace on clearance.  I would not wear or gift this necklace as is, but the colors were great and I really liked the individual beads.  Since it was a multistrand necklace, it had a LOT of beads.  To buy this many beads at a craft store would have cost far more than the $5 clearance price of the necklace.  So I have a few jewelry making items at home including  the long pin-like posts for dangling earrings and the hoops for attaching them to the ears. I also have some needle-nose pliers which are essential for making jewelry. 

With these few items and about 2 hours one afternoon, I changed one ugly necklace into 12 pairs of earrings and a single strand necklace that I liked much better.  SPOILER ALERT: If you receive a pair of earrings from me for an upcoming holiday or birthday, please pretend to act suprised. ;)
All 12 pairs before being attached to ear hoops.


Some more detail on a few pairs
The necklace and one of the pairs of earrings.
 
 
Here's to seeing the potential in something.